Create Officejs app in ERP5 Introduction
This tutorial will teach how to work with ERP5-OfficeJS framework to create OfficeJS applications by only working on ERP5 configuration side, with minimun (or even none) html-js programming.
It provides a step by step guide to create from scratch an officejs app that can use all officejs available storages and works 100% offline, only by focusing the effort on ERP5 configuration.
Further Information: https://officejs.nexedi.com/
It relies on ERP5, so be sure to have an ERP5 instance configured for OfficeJS developing. Please check: https://www.erp5.com/develop
Create an OfficeJS-ERP5 application

Let's create a nice text editor application
Open up the details, or press the down arrow in slideshow mode, to see further details of all the sections, specially those that display code: the details contain line-by-line comments about it. This tutorial assumes that you have read every single one of these details, all in order!
This chapter shows how to create an OfficeJS app in ERP5 and introduces the most important configuration aspects.
Some considerations:
- The development of an app using ERP5-OfficeJS framework involves mainly to work on ERP5 configuration, so it is desirable to have previous knowledge about ERP5 usage and development (See tutorial https://www.erp5.com/erp5-Tutorial.Creating.A.Forum.Module)
- The tutorial app will be based on a very simple design at the beginning, reusing existing erp5 portal types and views. Later in the tutorial we will add our own portal types, form views, custom actions, etc.
Table Of Content
- Configure your instance
- Basic app configuration
- Run your app
- Configure specific types and views
- Check your app
- Improve the document view
- Use ERP5 storage
- Add a custom action
- Make your app work offline
Configure your instance

The first step is to bootstrap your instance to get it ready for officejs development. By doing this, you will get all the business templates needed.
Got to the My Favourites menu -> Configure your Site -> OFFICEJS SDK Configure.
Configure your instance

Follow the steps and install.
Configure your instance

Wait for the installation to finish.
Configure your instance

Done. All needed business templates were installed. Your instance is ready for officejs development.
Create a Web Site

Go to Web Site Module -> Action -> Add Web Site to create a new Web Site. Fill all the fields as in the image.
"WebSection_renderOfficeJSApplicationPage" is the value for the fields:
- "Container Layout"
- "Content Layout"
- "Renderer ID"
"WebSection_viewOfficeJSApplicationPreference" is the value for the field:
Configure Web Site Layout Configuration

From your Web Site go to Layout Configuration tab. Fill all the fields as in the image.
Create App Web Section

From your Web Site -> Action -> Add Web Section. Fill all the fields as in the image.
"WebSection_renderDefaultPageAsGadget" is the value for the fields:
- "Container Layout"
- "Content Layout"
- "Renderer ID"
"WebSection_viewRenderJSPreference" is the value for the field:
Configure App Layout Configuration

From your App Web Section, go to Layout Configuration tab. Fill all the fields as in the image.
Content Security Policy field content for basic officejs usage:
"default-src 'self'; img-src 'self' data:; media-src 'self' blob:; connect-src 'self' https://content.dropboxapi.com https://api.dropboxapi.com data: *.host.vifib.net *.node.vifib.com *.erp5.net; script-src 'self' 'unsafe-eval' 'unsafe-inline'; font-src 'self'; style-src 'self' 'unsafe-inline' data:; frame-src 'self' data:"
If your app needs to allow interaction with other domains, you can add them here.
Create Hateoas Static Web Section

From your Web Site -> Action -> Add Static Web Section. Fill all the fields as in the image.
"StaticWebSite_getRedirectSourceUrlForOfficeJSApplication" is the value for the fields:
- "Container Layout"
- "Content Layout"
- "Renderer ID"
Create the app Configuration Router

Go to Web Page Module -> Action -> Add Web Page to create a new HTML Web Page. Fill all the fields as in the image.
Do not forget to publish the Web Page: Action -> Publish Document Alive
App Configuration Router
<!doctype html>
<html>
  <head>
    <meta http-equiv="Content-type" content="text/html; charset=utf-8" />
    <meta name="viewport" content="width=device-width" />
    <title>OfficeJS Router Gadget</title>
    <!-- renderjs -->
    <script src="rsvp.js" type="text/javascript"></script>
    <script src="renderjs.js" type="text/javascript"></script>
    <script src="gadget_officejs_router.js" type="text/javascript"></script>
  </head>
This document will contain all your app configurations such as portal types, actions, views, custom header buttons and more.
Router header:
- Lines 1–4: generic HTML boilerplate and router standard specifications.
- Lines 5–6: load RSVP.js and RenderJS sources.
- Line 7: load the gadget script, gadget_officejs_router.js, which contains all the logic for the router gadget.
App Configuration Router
  <body>
    <script data-renderjs-configuration="configuration_manifest" type="text/x-renderjs-configuration">gadget_officejs_nice_editor.configuration</script>
    <script data-renderjs-configuration="parent_portal_type" type="text/x-renderjs-configuration">Web Page Module</script>
    <script data-renderjs-configuration="parent_relative_url" type="text/x-renderjs-configuration">web_page_module</script>
    <script data-renderjs-configuration="portal_type" type="text/x-renderjs-configuration">Web Page</script>
    <script data-renderjs-configuration="portal_skin_folder" type="text/x-renderjs-configuration">erp5_text_editor</script>
    <script data-renderjs-configuration="app_actions" type="text/x-renderjs-configuration">('Web Page Module | text_editor_view')</script>
    <script data-renderjs-configuration="app_allowed_sub_types" type="text/x-renderjs-configuration"></script>
    <script data-renderjs-configuration="web_page_module_dict" type="text/x-renderjs-configuration">{"title": "Nice Text Documents", "filter_action": 1, "hide_add_button": 0}</script>
    <script data-renderjs-configuration="app_view_reference" type="text/x-renderjs-configuration"></script>
    <div data-gadget-url="gadget_erp5_router.html" data-gadget-scope="erp5_router"></div>
  </body>
</html>
Remember we were going to reuse existing portal types to start? Well, "Web Page Module" will be our base portal type.
To keep it simple for now, we will reuse other configurations like the skin folder and portal type actions.
Router body configuration entries: This works as a kind of setting dictionary for the app. Most of the entries are mandatory to make the app work within the ERP5-OfficeJS framework.
These are:
configuration_manifest: filename for the configuration manifest of the app that will be created laterparent_portal_type: the base portal type of the app. For now, we will use the pre-exising Web Page Module to list documents. Later we will create our ownparent_relative_url: relative url for the parent portal typeportal_type: the base portal type of a document. Again, using a pre-existing one for now.portal_skin_folder: skin folder that contains all forms involved for views and any resource our app needs. For now, using the pre-existing one that contains the view-forms for Web Page portal types.
app_actions: a list of pairs of all portal types and view/actions of the app. Each pair follows this convention: 'Portal Type | view-action'app_allowed_sub_types: list of all sub types allowed by the app portal types. For now, we have only one portal type, so this is empty.portal type dict: each portal type will have its own dict of setting to specify its particular configuration.
The name of the entry follows the next convention: My Portal Type -> my_portal_type_dict. So, for Web Page Module: web_page_module_dictFor now it will have a few settings, later we will use more and list all the possibilities
app_view_reference: the default view reference for the app portal types, in case no view is define
Run the app configuration action


The basic app configurations were done, only remains to run the app configuration action.
Based on the information set in the app router, this action will generate all the resources urls to store all elements definitions in the browser storage. These urls will be saved into the configuration_manifest declared in the router.
From your app web section go to -> Action -> Create App Configuration Manifest and confirm the dialog by clicking the Create Configuration Manifest button.
Check the result message to verify if the process succeeded without errors.
* The app configuration action must be run after any configuration change on portal types and forms in order to update the element definitions.
Run your app

If everything was done properly, you should be able to access your app with the url [instance]/erp5/web_site_module/officejs_nice_editor/
At the beginning you might see an error on the bootloader page. This page saves all your app resources to make it usable offline, but it isn't fully configured yet in our app. Let's ignore it for now, you can skip it.
The next page should be "Storage Configuration" page, where the user will select the storage for the app documents. For now, Local is Enough
Run your app

And now we arrive to our app homepage, that is the default view for our base portal type: Web Page Module. So we see an empty list of documents
Until this point, we reused some pre-existing configuration elements (types, skin folder, forms) from ERP5 in order to see some results quickly and learn the basics of app configuration
But in the next steps let's create all the specific elements for our app
Configure specific types and views
Create Portal Skin Folder

Let's create our own module for the app documents to get rid of Web Page Module in configuration.
Create a portal skin folder for our app, named erp5_nice_editor: go to /erp5/portal_skins/manage_main -> Add Folder -> set Id -> Add
Create portal types views


For each new portal type automatically created after the module creation, add an Action Information sub object that will be used as the portal type view in the app.
Go to My Favourites menu -> Configure Portal Types (or via url to erp5/portal_types) and search for Nice Document Module. Within the portal type, got to Add -> Action Information in order to add a view. Do the same for Nice Document portal type and fill the fields as described in the images.
- Respect all the configurations: Category, Title, Permission, etc
- IMPORTANT: go to Metadata tab and change the id of the object. It must be the same as the reference: "nice_editor_view".
- Note the action field content: string:${object_url}/[form_ID]. It is a TALES expression, the base path will be resolved dynamically by the context, and form_ID will be the form-view for the portal type
- The form Ids, respecting the namign convention, should be: "NiceDocumentModule_viewForNiceEditor" and "NiceDocument_viewForNiceEditor"
You can see all the portal type views and actions, including the view you just created, in the Actions tab of the portal type.
Configure Listbox

Let's configure the listbox field in the Module View to make it usable by the app UI.
Go to NiceDocumentModule_viewForNiceEditor -> listbox and modify it as shown in image (pay attention to checkboxes!)
Leave the NiceDocument_view form as it is.
Update Router Configuration
  <body>
    <script data-renderjs-configuration="configuration_manifest" type="text/x-renderjs-configuration">gadget_officejs_nice_editor.configuration</script>
    <script data-renderjs-configuration="parent_portal_type" type="text/x-renderjs-configuration">Nice Document Module</script>
    <script data-renderjs-configuration="parent_relative_url" type="text/x-renderjs-configuration">nice_document_module</script>
    <script data-renderjs-configuration="portal_type" type="text/x-renderjs-configuration">Nice Document</script>
    <script data-renderjs-configuration="portal_skin_folder" type="text/x-renderjs-configuration">erp5_nice_editor</script>
    <script data-renderjs-configuration="app_actions" type="text/x-renderjs-configuration">('Nice Document Module | nice_editor_view', 'Nice Document | nice_editor_view')</script>
    <script data-renderjs-configuration="app_allowed_sub_types" type="text/x-renderjs-configuration">('Nice Document Module | Nice Document',)</script>
    <script data-renderjs-configuration="nice_document_module_dict" type="text/x-renderjs-configuration">{"title": "Nice Text Documents", "filter_action": 1, "hide_add_button": 0, "history_previous_link": 1}</script>
    <script data-renderjs-configuration="nice_document_dict" type="text/x-renderjs-configuration">{"title": "Nice Text Document", "editable": 1, "history_previous_link": 1}</script>
    <script data-renderjs-configuration="app_view_reference" type="text/x-renderjs-configuration">nice_editor_view</script>
    <div data-gadget-url="gadget_erp5_router.html" data-gadget-scope="erp5_router"></div>
  </body>
Don't forget to update the app configuration
by running the app configuration action again!
Now we must update our app router configuration so it can take into account the new views and portal types you have created for the app.
Notice that any mention to pre-existing elements, like Web Page Module, were removed.
The following entries were updated with the new elements:
portal_skin_folder, nice_editor_view, app_actions, app_allowed_sub_types and portal type dictionaries.
An entry dict was added for each new portal type. The dictionary of a portal type sets different configurations for it and its view. Please check the following detail section for further information.
Note: to force to refresh your changes on configuration elements (like forms), change the modification date of your app site or app web section (clicking on save button will be enough)
A portal type dict could have any of the following values:
title: string. Title display in the header for the form.panel_action: boolean (0-1). Enables action button in the header.upload_button: boolean (0-1). Enables upload button in the header.download_button: boolean (0-1). Enables download button in the header.hide_add_button: boolean (0-1). Hides header add button.jump_button: boolean (0-1). Enables jump button in the header.fast_input_button: boolean (0-1). Enables fast input button in the header.export_button: boolean (0-1). Enables export button in the header.filter_action: boolean (0-1). Enables jump button in the header.previous_next_button: boolean (0-1). Enables previous-next buttons in the header.history_previous_link: boolean (0-1). Enables history link in the header title.editable: boolean (0-1). Enables editable view.hide_listbox_buttons: boolean (0-1). Hides configuration buttons in listbox field on the view formblob_type: string blob type. Used to store the document attachments.blob_create_object_url: boolean (0-1). Sets if a blob is handle using URL.createObjectURL(blob) or readBlobAsDataURL(blob).custom_view_gadget: string gadget name. Used to render a custom view for the portal type.
Check your app

Run your app again to check the new views. Remember that the issue in the bootloader page isn't important now, you can skip it.
First thing you should notice is the add button available in the home page header. Also the "Nice Documents (0)" label is new, it comes from the listbox in the new form you created.
Create a document

Click Add button to create a new document.
A new document was created, and this is its view. Change the title field and save. If you go back to the documents page, you will see it in the list box.
Created document

Improve the document view
Improve the document view


Now let's add more fields to the document view. Go to the form for the Nice Document view of the app and add one StringField and two TextAreaField to be used as reference, description and text content fields.
Edit the form Order tab and move the description to the center, the reference to the right, and the text content to the bottom.
* Remember that the erp5 instance view and app view aren't the same. If you want your changes in your instance view too, you will have to modify its form as well.
Note: to force to refresh your changes on configuration elements (like forms), change the modification date of your app site or app web section (clicking on save button will be enough)
Improve the document view

Now check how your document view looks.
Improve the document view

It would be good to have a cool text editor instead of a text area: remove the text content TextAreaField and add a GadgetField instead.
Inside the gadget field, set the Gadget Url property with gadget_editor.html and fill the RenderJS Extra property with:
{"editor": "fck_editor", "maximize": true} | {"editor": "fck_editor", "maximize": true}
For more details on how gadget editor works, please check the code here.
Improve the document view

Now check how your document view with editor looks.
Use ERP5 Storage


Let's use our ERP5 instance as storage for our new documents. Go to storages (left panel link) and pick "Erp5" in the storage page.
Set the Connection Url to [your-instance]/erp5/web_site_module/ and proceed.
IMPORTANT: default url is real ERP5 site, it doesn't have your new modules and portal types so it won't work. Be sure to use your instance url.
Wait for the synchronization.
ERROR! At this point the app will fail. Neither your app nor erp5 knows how to store and fetch this kind of documents.
Jio view for Nice Document

ERP5 needs a jio_view of the documents to be be able to save them.
Go to Nice Document portal type and add an Action Information object like the one in the image.
For now, the pre-existing connection form WebPage_viewAsJio (located in erp5_officejs_jio_connector portal skin folder) is enough, because your Nice Document portal type suits well with it and it covers all the fields. In a future, a new form for the jio_view can be created if needed.
Now ERP5 can handle the documents via their jio_view and the replication should work.
For further information, please check https://jio.nexedi.com/, in particular the Erp5Storage section.
Synchronized Documents

After a sync is done, you should be able to see the created documents from the app in the nice_document_module and vice versa.
What's next?
We have a functional online application to create and edit documents, and save them in at least 2 different storages. We reached this point without write a single line of code. Everything was done via ERP5 configuration.
But of course not all needs and particular aspects of an app could be contemplated using only configuration. It will be for sure needed at some point to add a particular ad-hoc functionality. See the following escenario.
Add a custom action

Imagine we want to have an easy way to clone a document in order to copy all its content without create a new one from scratch. So let's add a Clone action to the Nice Document type.
Create a new Action Information in the Nice Document portal type as described in the image. Don't forget to change the action id in the metadata tab (same id as reference).
The action path form Id is "Base_cloneDocumentForNiceEditor".
Custom clone action

Create in the portal skin folder the form set in the Action field
Add any form content to be displayed in the action view (if not, standard dialog form will be shown). Let's add just a label field to display a text in the action dialog page.
Add a Gadget Field named gadget_field_action_js_script (the name is a convention). This is a configuration required to make the action form be treated as a custom action, and to link the custom action code that we will write.
Custom Clone Action

Configure the gadget field as in the image, set the "Gadget Url" propery with the reference of the custom gadget that will perform the action, for example: action_nice_editor_clone.html
Create Custom Action Gadget

In the app skin folder, create the two files that will compose the custom gadget: action_nice_editor_clone.html and action_nice_editor_clone.js
The html is trivial: usual rsvp and renderjs scripts, and of course, the script to the action_nice_editor_clone.js
Custom Action Gadget Code
  (function (window, rJS, RSVP) {
  "use strict";
  rJS(window)
    .declareAcquiredMethod("jio_get", "jio_get")
    .declareAcquiredMethod("jio_post", "jio_post")
    .declareMethod("preRenderDocument", function (parent_options) {
      var gadget = this;
      return gadget.jio_get(parent_options.jio_key)
      .push(function (parent_document) {
        return parent_document;
      });
    })
The js script will must respect an interface and the return data format of the methods.
The gadget acquires jio_get and jio_post methods that will be needed in our code.
Then, first interface method: preRenderDocument.
This method is executed before rendering the action form, and it returns a document dictionary that contains the document fields. In this case, it gets the base document to be cloned, using the jio_key from the parameters.
Custom Action Gadget Code
    .declareMethod("handleSubmit", function (content_dict, parent_options) {
      //must return a dict with:
      //notify: options_dict for notifySubmitted
      //redirect: options_dict for redirect
      var return_submit_dict = {
        notify: {
          message: "",
          status: ""
        },
        redirect: {
          command: "display",
          options: {}
        }
      }, gadget = this,
        document = parent_options.doc,
        property;
      delete content_dict.dialog_method;
      for (property in content_dict) {
        if (content_dict.hasOwnProperty(property)) {
          document[property] = content_dict[property];
        }
      }
      return gadget.jio_post(document)
        .push(function (jio_key) {
          return_submit_dict.notify.message = "Document Cloned";
          return_submit_dict.notify.status = "success";
          return_submit_dict.redirect.options = {
            jio_key: jio_key,
            editable: true
          };
          return return_submit_dict;
        }, function (error) {
          if (error instanceof jIO.util.jIOError) {
            return_submit_dict.notify.message = "Failure cloning document";
            return_submit_dict.notify.status = "error";
            return return_submit_dict;
          }
          throw error;
        });
    });

}(window, rJS, RSVP));
The second interface method is handleSubmit: handles the submit of the action page and returns a result dictionary with following format:
notify: dictionary options for notifySubmitted method in parent
message: message to be display after submit the actionstatus: status of the submit operation
redirect: dictionary options for redirect method in parent
- redirection
command and command options dictionary
To have a better understanding about this and also for debugging purposes, take a look to the source code that handles the custom actions:
https://lab.nexedi.com/nexedi/erp5/blob/master/bt5/erp5_officejs/PathTemplateItem/web_page_module/gadget_officejs_page_handle_action_js.js
Update Router Configuration
<script data-renderjs-configuration="app_actions" type="text/x-renderjs-configuration">('Nice Document Module | nice_editor_view', 'Nice Document | nice_editor_view', 'Nice Document | nice_editor_clone')</script>
Don't forget to run the app configuration action!
Update the router configuration to add the clone action, by adding the action in the app_actions entry: 'Nice Document | nice_editor_clone'.
Don't forget to run the app configuration action.
Check the new action in the app

In the app, go to any document and you will notice an Actions button in the header.
There is also a new Actions seciton available in left panel.
Click on Actions header button.
Document Actions Page

This page lists all the actions available for the document, including our new Clone action.
Click on Clone action.
Clone Action

Here we can see the action dialog form, including the label we added to it. At this point the preRender method of our custom gadget was already called, and by clicking on Clone we will submit the form, calling the handleSubmit method.
Cloned document

As a result, a new document is created with exactly the same content and values. We can see the notification message we set in the return dict of the handleSubmit method.
Make your app work offline
Remember the bootloader we skipped at the beginning? It is in charge of storing all the resources needed for the app to work offline. Let's configure our app to use it.
Configure Cache File

First thing is to declare the Cache File of the application, which the bootloader needs to work. If you go to the bootloader page, by accessing the root url of your app, you will see the error "Precache manifest not specified".
So go to the Layout Configuration page of your Web Site and fill the Cache File field with WebSection_getPrecacheManifest.
By default, this script returns some elemental resources but we must point what else is needed for our app.
Configure Precache Scripts

To point what elements are specific for our app, we must create our own precache script that returns a list of those elements, and set it in the app configuration.
Go to App Web Section -> Layout Configuration Tab, and fill the Service Worker Precache Manifest Script List field as in the image.
WebSection_getOfficeJsPrecacheManifestList is the precache script with base OfficeJS elements, this is needed for most of OfficeJS applications.
WebSection_getCKEditorPrecacheManifestList returns all the elements needed by the editor used by our app to edit the documents.
WebSection_getNiceEditorPrecacheManifestList doesn't exist yet, let's create it.
Precache Script

In the app skin folder, create a script as show in the image. It contains very few elements that are specific to our app: the router, the configuration file mentioned in the router, and the gadget files for our custom action.
In the future, any new element we add in our app should be pointed here in order to keep the app working offline.
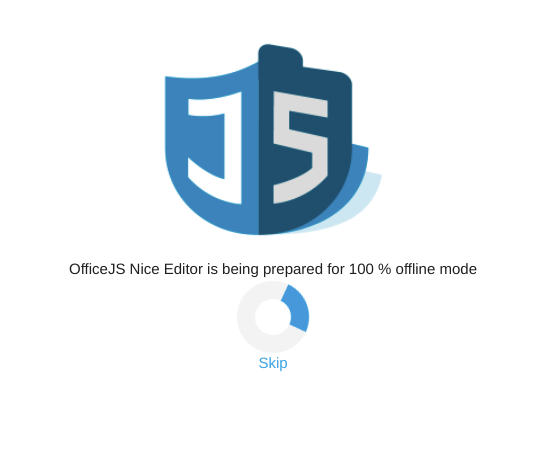
Run the app bootloader

Go to the root url of your app to access the bootloader. No error should be displayed this time. Wait while it stores all the elements indicated in the precache scripts.
When finished, your app is ready to be use offline! Give it a try.
Congratulations
Well done! You've just made a fully responsive, storage-agnostic, modular, mobile-friendly, offline-first, progressive web application. You can check out OfficeJS framework code on Nexedi Gitlab.
Thank You
- Nexedi GmbH
- 147 Rue du Ballon
- 59110 La Madeleine
- France